Golf clubs are kind of like cars. As soon as you use them, they are not worth as much, and they are subject to scratches, dents, and damage. If you have been around the game of golf long enough, chances are your clubs have a bit of damage.
Many golfers wonder how to remove scratches from golf clubs and whether or not it is even possible to do this. Luckily there are some ways to get rid of golf iron scratches and to remove nicks from golf clubs, but it really depends on the level of damage.
Let’s take a look at some of my most effective ways to get your clubs looking new again.
How do I remove scratches from my golf club irons?
To remove scratches from your golf club irons, you can use a combination of deep cleaning as well as polishing. The process is not overly complicated, but it does take some time. The most important part of the process is to identify if the clubs are damaged because of the scratches or if they are just superficial.

The process by which you remove scratches from golf clubs will vary based on the types of clubs you have and any of the special finishes on the clubs. Luckily golf irons are a bit more durable than woods and hybrids, so removing scratches may seem a bit easier.
Types of scratches on golf club irons
Not all golf club scratches are the same. I have seen some scratches that come out incredibly easy and others that will never go away. I know some of the scratches and knicks on my clubs are caused simply by having them in the golf cart. Here are some of the scratches and how you can tell the difference.
Tee marks
When you use your irons on a par 3, chances are you tee the ball up a little. Teeing the ball up can help to ensure that you strike the center of the clubface and get the most out of your shot. However, some of these tees are colored or made with certain materials that end up leaving some residue on the face of the iron.
Deep Scratches
Deep scratches were likely caused by some sort of mistake. This could have been when you played with a golf ball that was cracked or maybe hit a rock on your downswing without realizing it. It’s good to understand that sometimes a deep scratch will not go away.
In addition, if you are playing with golf clubs made with a slightly softer metal, the chance of a deep scratch could be higher.
Light Scratches
Light scratches are normal. These can happen just by making contact with a ball or a small rock that was in a bunker. The light scratches are typically the easiest to get rid of, but most of them will have no impact on the way that you play the game.
Damage
True damage to a golf club can sometimes not be repaired. The times that I have seen this happen usually are when golf clubs fall off of a cart. If you are driving along and someone forgets to strap the bag in place, there could be real damage done to the clubs.
How To Remove Scratches From a Driver
Sometimes it is not just the irons that get a scratch. Many golfers struggle with scratches on the driver, and this can be a problem. If you follow golf new closely and you have seen some of the recent material changes in golf clubs, there are even more precautions that you have to take when removing scratches from a driver. Here are the best ways to get a scratch off of a driver.
In this section give a step-by-step method of how to remove scratches on a driver.
Check The Severity of the Scratch
The first part of this process is always checking and ensuring that the scratch is not causing an issue with performance. In the case of the driver, most of the scratches are on the head of the driver. These are not going to have any impact on performance.
If you have a scratch that is large on the face of the driver, you may want to have it looked at by a professional.
Sometimes these scratches, if deep enough, can cause issues with the total distance and carry of your golf shots.
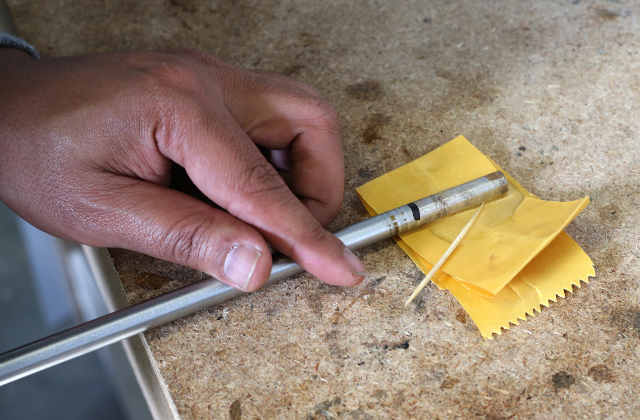
Collect Supplies
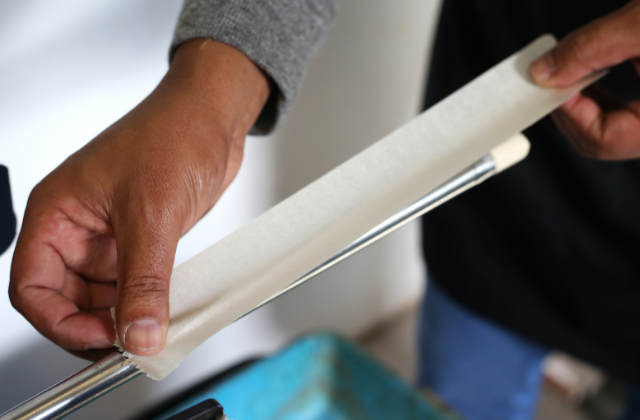
To prepare to fix the scratch on your driver, make sure that you first have all of your supplies in place. For this process, you will need a microfiber cloth, a bucket with soap and water, painter’s tape, golf club repair paint or automobile paint, and a clean and temperature-controlled area to work.
Clean Surface
Once you have collected your supplies, it is a good idea to clean the driver entirely. Take the club head and submerge it in a bowl of soapy water. Then use a microfiber cleaning cloth to completely clean the driver’s head.
Do the best you can to gently scrub the driver and remove all of the excess dirt and debris on the club.
Once you have the driver clean, make sure it dries fully.
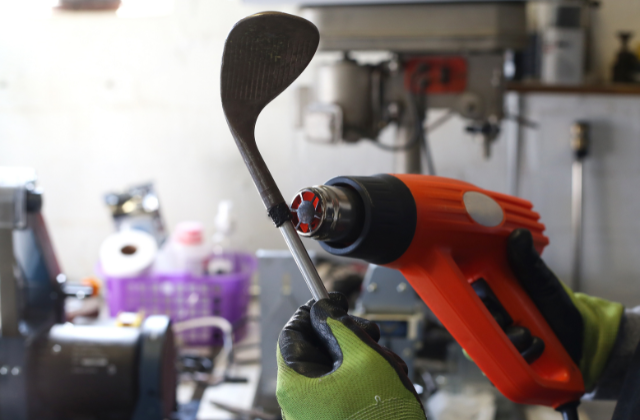
Remove and Repair Scratch
If the scratch does not come off in the cleaning process, you will have to paint it. Simply tape up the top of the driver so that the area you need to paint is the only thing exposed. Once you have the paint blocking the rest of the club, you can spray the paint on to cover the spot.
Obviously, this will make the scratch look better, but it certainly won’t repair it.
Give the Driver Time To Dry
Before heading back out to the driving range, I highly recommend giving the driver some time to dry. This will allow you to ensure that it is ready for play.
How to Remove Tee Marks From a Driver
Tee marks will show up on the face of your golf driver. It’s very common to have tee marks as all golfers tee the ball up with the driver. In fact, we encourage you to tee the ball at a level that will mark the driver’s face.
Some tees do quite a bit of damage when it comes to tee marks; here is how you can get rid of them.
Clean The Club
The first and probably most important part of this process is to clean the golf club. Most of the time, soaking the golf driver in a bowl of warm soapy water will be all that is necessary to remove the tee marks.
However, there are times when it takes a bit more work.
Scrub With Cloth
Once you get the golf driver clean, you will need to scrub it with a cloth to ensure that you get the tee marks off. The best cloth to use is typically a microfiber cleaning cloth. The cleaning cloth should not be abrasive, and it must be something that you can ring out.
I had used cotton cloth before and had some great luck with that as well. Sometimes a towel that has a slightly rougher design to it or a raised design can help ensure that the tee marks rub off.
Most of the time, this is just paint that needs to be removed. It was transferred to the club when you made an impact with the ball and tee.
Be Careful Of The Tees You Choose
Once you have the golf clubs cleaned up, and all tee marks have been removed, you will want to be careful of what tees you use. The painted wooden tees may look nice, but they often leave behind the most tee marks.
Some of the plastic tees will not transfer anything aside from a little residue that often comes off when you wash the club down. The tees you choose matter when it comes to keeping the clubs in great shape. Good quality tees will not harm the clubs.
Visit this article on how to clean a golf ball by Skilled Golf.
How To Remove Sky Marks From a Driver
Sky marks are the worst. If you get under the ball on your driver, the top of the club gets scuffed up. Sometimes these scuff marks or sky marks come right off, and other times you will need to do a bit more work.
Clean The Driver
The driver has to be clean before you can remove the sky marks from the driver. Sometimes these sky marks start to come off simply by cleaning. Always start with this part of the process, as you could save yourself a ton of time and even some expenses.
Prepare To Paint
The sky mark is likely only in one small spot on the top of the driver. Some golfers choose to paint the entire top of the driver, but most of the time, it makes sense to paint just the small area where the scuff is.
Use painter’s tape to mark and square off the area where you are going to paint. Paint the driver carefully, ensuring you don’t get any paint near the face of the club.
Allow To Dry
Most of the golf club touch up, or automobile pain that you purchase will dry rather quickly. However, I often like to let the club sit for 24 hours before I use it. In addition, you will want to make sure you avoid future scuff marks, as they will happen easily if you do it again on this newly painted surface.
How to Remove Scratches from Iron Golf Clubs
Irons are quite durable and don’t usually have the same issues with scratches and scuffs that you find on drivers. If you get a scratch on your iron, you can do a few things to help remove it.
Clean The Irons
Always clean the irons and make sure that you are working with a golf club that is not covered in dirt and sand. Sometimes players think they have large scratches on their equipment, and it turns out to be dirt or debris.
Fill In The Scratch
Some players have found that using toothpaste on a golf club can help fill in some superficial scratches. We have never found too much luck with this, but it is worth a shot for some golfers.
I would not recommend filling any type of scratch that is on the clubface. This could impact the way that the ball comes off the face, and that won’t be worth it.
Starting with a good clean club and filling in with a little toothpaste is a good start. However, for the most part, the best thing you can do with a scratch is to polish the club.
Polish The Club
The golf club polish can also work as a filler on the very small scratches that are not all that deep. Use the polish to get into the crevices on the club, and then wipe the polish off. The polish should also make the clubs slightly shinier.
It’s important to ensure that your golf clubs do not have any special finishes on them that will be ruined by the polish. Golf club polish specifically states where you can use it and where you should choose a different material.
Allow Time To Dry (Wipe Off Excess Material)
The golf club needs to dry after you have wiped off all the excess material and polished it. Leaving extra golf club polish on the club could end up impacting the way the ball comes off the face. I would recommend wiping the club with a wet microfiber cloth once the polish has dried. If you do this, you should notice a much lower chance of the ball flight being impacted.
How do I protect my golf club irons from scratches?
If you are struggling with golf club scratches and finding them on your golf clubs, here are a few things that you can do to try and keep them away.
- Use golf iron headcovers
- Make sure your golf bag has 14 or 15 slots to keep all clubs away from each other
- Use headcovers on the golf clubs that are next to the irons
- Make sure you don’t hit shots off of a cart path or a tree stump
- Clean the clubs throughout your round so that sand and dirt do not create additional scratches
- Make sure that clubs are not hitting against each other as you walk or ride the golf course
FAQs
Here are a few of the most common questions that you will come across when you are looking to remove scratches from golf clubs.
Conclusion
We hope you now have a better understanding of how to remove scratches from golf clubs. This process shows us all that keeping clean golf clubs is the most important part of it all. Most of the time, when you wash golf clubs, the superficial scratches will come right off the clubface. As you get involved with more deeper scratches, you may need to send the clubs back to the manufacturer. Companies like Ping have periodically offered this service through the years.